As Microsoft released the new product cycle for SharePoint there was one big change announced: User Profile Synchronization Service is deprecated and not included, only Active Directory Import and an external Identity manager enable SharePoint to get User Profiles.
As we all had our pain points with the User Profile Service regarding Forefront Identity Manager at first everyone seemed to be happy.
Well, at first. What about the need to sychronise Information from Active Directory to SharePoint and vice versa ?
Active Directory Import can't help you with that need.
Because of that and to provide an identity management platform, Microsoft has release the Microsoft Identity Manager (MIM) to achieve that.
So how is this stuff set up ?
First, you have to download the tool here. Please note that this is a evaluation version.
Please also note, that Microsoft Identity Manager should be installed on a box separate from SharePoint. You have the option to install it on SQL or on a remote machine.
In my scenario, I didn't want to install it on a separate machine and installed it on the SharePoint Server.
´
You can follow the wizard as shown in the screenshots.


Next you have to enter the service account under which the service will run.

Next Some Groups have to be entered.

BOOM - First error. The Groups already have to exist. It would be too much if the setup could create the groups for us ;)

After entering existing groups everything works as designed.


We get the information that the encryption key needs to be stored so we give it a name and save it.


For reference you can read this article.
As next step we have to start Central Administration and switch the Synchronization Mode from Active Directory Import to External Identity Manager.
This can be done via this path: Application Management -> Manage Service Application -> Click "User Profile Service" -> Configure Synchronization Settings -> Select "External Identity Manager" and Click Ok.
Now we need to download some files to make the Identity Manager work:
- First download the solutions files from here.
These files contain the information that is needed for the synchronization to work properly.
- Now we need to download following Hotfix Package (KB3092179)
- To make the synchronization work with SharePoint, we also need to download the SharePoint Management Agent (SPMA)
Now we install the Hotfix Package we downloaded in the steps above:
First we extract the package to a folder (in our case C:\DEMO\MIM)


Next we double-click the FIMSyncService_x64_KB3092179.msp to start the installation.


BOOM - Second Error: We need to stop the Service and retry the Installation.


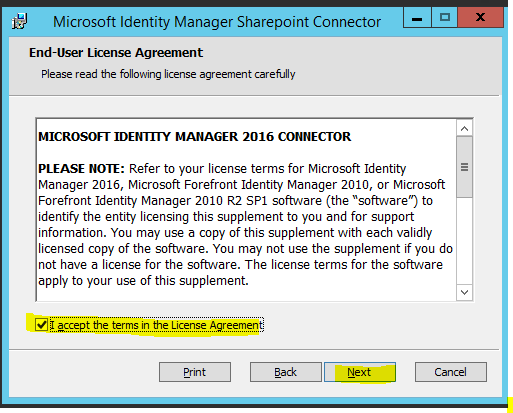
After the update has completed, we now have to install the SharePoint Connector to make synchronizing with SharePoint work.


This will complete the installation of Microsoft Identity Manager for User Profile Service in SharePoint 2016. Next, We have to configure the Synchronization for the User Profile Service.
For this task we need the solution files we downloaded.
The purpose of the files is as follows:

In the next step we install the solution files and configure the sync.

Install-SharePointSyncConfiguration -Path "C:\SharePointSynchronization" -ForestDnsName spdevdom.local -ForestCredential (Get-Credential spdevdom0\administrator) -OrganizationalUnit 'ou=Users,dc=spdevdom,dc=clocal' -SharePointUrl http://spdev2016:2016 -SharePointCredential (Get-Credential spdevdom0\administrator) –Verbose

First we get the prompt for the account we specified during setup. Enter the proper credentials here.


As the verbose output shows the synchronization seems to be setup correctly. I will come back to the term "seems" shortly.
Now we start the synchronization with the command shown below.
Start-SarePointSync -WhatIf -Verbose
The WhatIf Switch means that the run will only be simulated and not actually executed.


As we can see there are zero updates, adds or deletes.
So something must be wrong here because we expect 22 adds in our environment as this is the initial import.
After a lot of digging around and launching the Synchronization Manager we can see that this is still the Forefront Identity Manager. Hooray, we can still work with this great tool *sigh*
So the solution to this problem is as follows:
1) Open the MIM Client
2) Select "Management Agents" in the top bar
3) Double-Click "ADMA"

In the pop-up, we select "Configure Directory Partitions" from the left navigation.
From there, we select the "DC=spdevdom,DC=local" partition and click on "Containers"

Et voila - We can see that no containers are selected for our domain. So it makes sense that nothing is imported during the run of our script.

For testing purposes I've selected all containers.

We close all open dialogues with OK.
Now we try to run our synchronization again.

Hooray - Now we have our 22 additions.
A look at the Profiles in SharePoint shows all our profiles now.
Hopefully this post can guide you through the not-so-straight-forward process of implementing Microsoft Identity Manager and help you synchronizing your people to SharePoint again.
Best Regards,
Chris

